Getting Ready for First Solo

Just about everything is in place except my ASIC security card hasn’t arrived yet. Technically it isn’t needed as Jandakot is not a security airport. The level 1 instructor told me I must have it before I can go solo. However I was encouraged by the missed mail delivery today, which says I have to sign for a delivery at the local post office. I called my instructor to see if you have to sign for your ASIC being delivered. The answer was yes! So my hopes are high…

So far, I’ve completed all the criteria to fly solo. What this entails…

1. All the 11 lessons which I’ve blogged about so far (the 12th was crosswind which isn’t a criteria)

2. All the documentation completed.
a) Aviation Reference Number
b) Medical
c) ASIC security clearance (hopefully at the post office)
d) Flight Crew license – Student PIlot Endorsement

3. Pre-solo exam – this test is a 20 question multiple choice / written test. It covers everything from what to do if your head on with another aircraft, radio failure, radio calls, engine failure procedures, cloud volume and a bunch of other random stuff I didn’t expect. It didn’t in the end cover anything about the aircraft.

Now, the hard bit. I have to fly with the Grade 1 instructor on Saturday and nail my circuits. This means carb heat, radio calls, downwind checks, speeds, landing flair and everything else has to be spot on. So at 1:30 this all happens and lets hope for perfect conditions and an instructor who thinks I’m up to it 🙂 If he gets it wrong, it could also be my last blog entry too. I’ll let you know, maybe…

Posted in Uncategorized | Leave a comment

Lesson 12 – “Crosswind” landing video

Here’s the video of the landings from Lesson 12.  Also note the close call with another aircraft on final…

Posted in cessna 152, Jandakot, Pilot License | 2 Comments

Lesson 12 – Survival (CrossWinds & Gusts at a rate of Knots)

Coming off the back of a busy week at work, flying this weekend was something to look forward to.  It was all looking great, except the weather.  Strong winds appeared on Saturday and then again this morning.  The Bureau of Meteorology (BOM) had forecast the strong gusty winds, but I was somewhat optimistic about the situation.

On arrival at Air Australia yesterday,  almost all the aircraft were still tied down. This included the Robins which are normally flat out taking unsuspecting passengers for a few spins, rolls and stalls over Cockburn sound.  My greeting from Adam, “Are you sure you wanna fly today?”.  “As long as it is safe”, was my reply.

Having completed the pre-flight, we both decided we would give it a go.  However before going any further, Adam said we’d have to do the “crosswind briefing”.  How right was he!

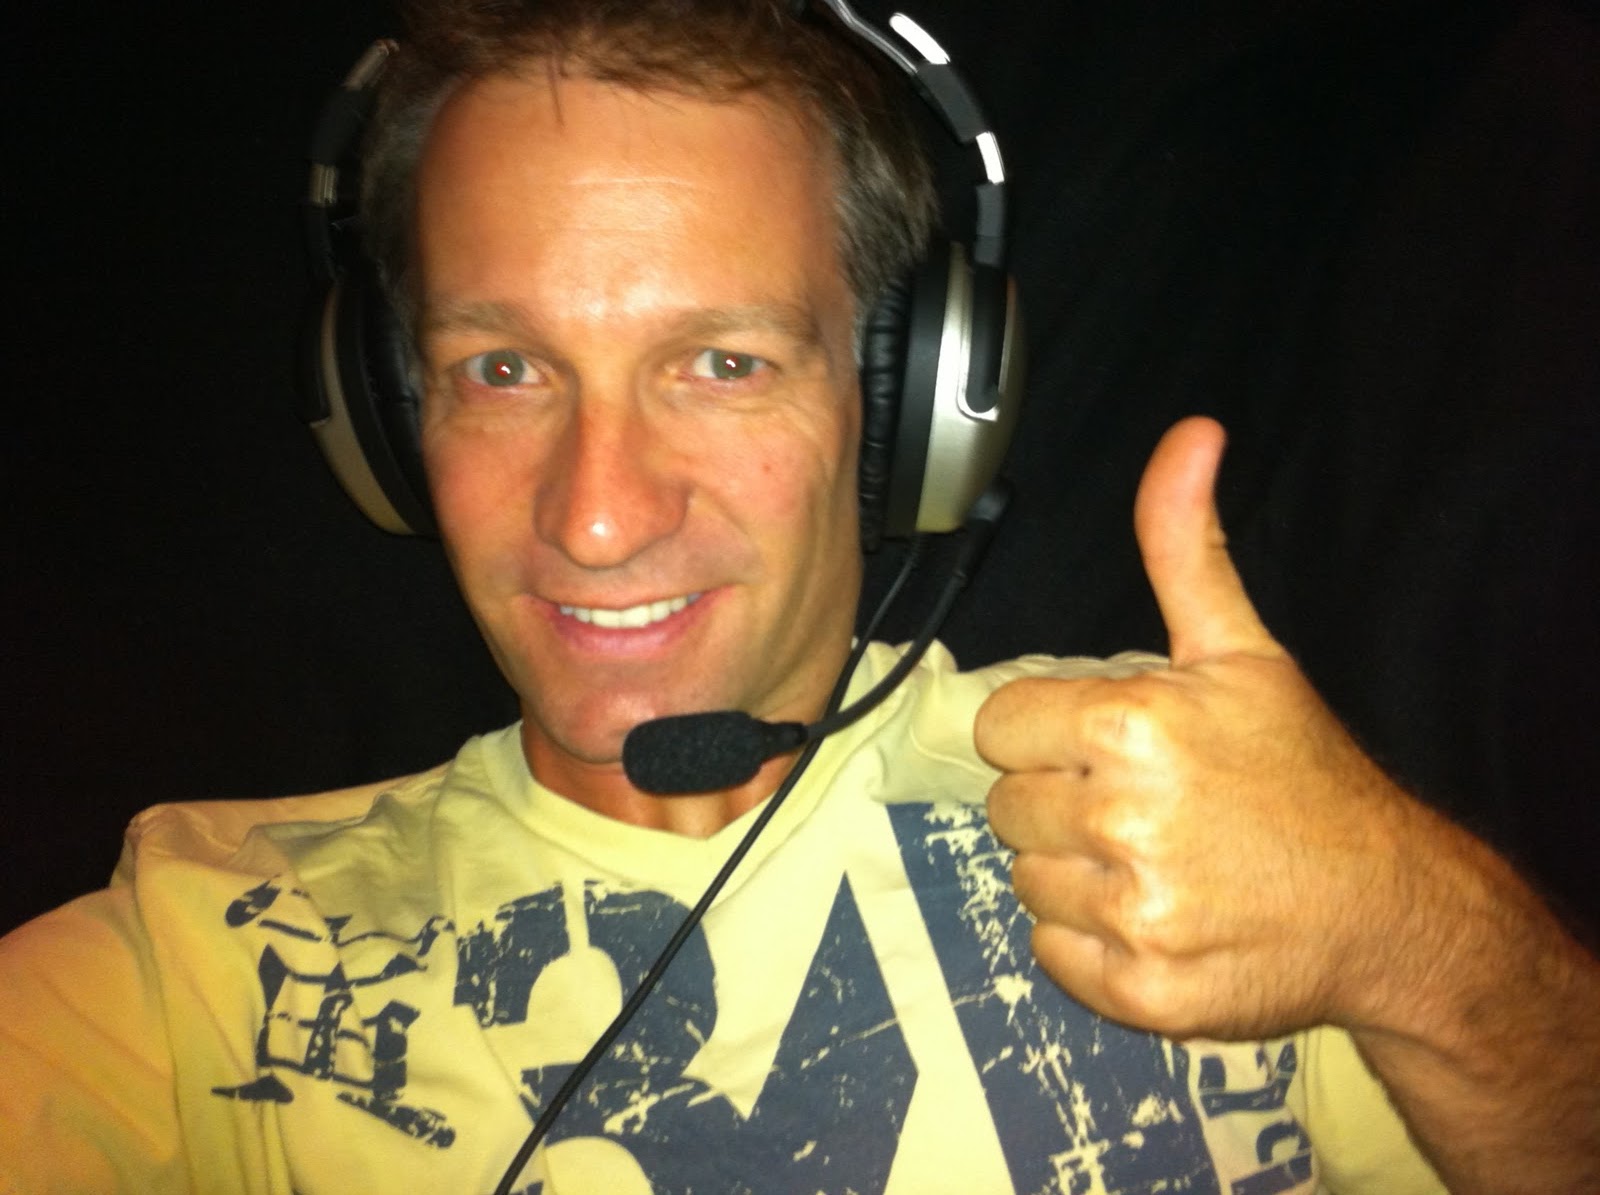
The briefing was quick and the technique seemed pretty easy.  Before I knew it we were rolling out to the run-up bay in our Cessna 152 (VH-IGX).  On board was my latest gadget, a digital sound recorder to capture all cockpit conversation.  It was wired in with a special cable that connects inline with the headset.  More on that another time.

All was good and we rolled out to runway 12.  After my somewhat tongue twisted ready call, we headed off into the 20-30 knot gusting winds with a good 14 knot cross wind component.  The thing the ATIS doesn’t tell you about the conditions is the turbulence factor.  A quick look this morning on the Air Services Pilot Briefing Service indicated that below 3000ft, there was considerable turbulence.  They were spot on!

We got tossed around like rag dolls at a pit bull party.  When I’ve previously tried similar conditions in the X-Plane 9 simulator, it seemed you got bounced around unrealistically.  I can now confirm, that it was quite realistic after all.  While climbing, flying “straight and level” (near impossible) and on the decent, we were getting thrown all over the place.  I had my trusty GoPro camera on board, mounted atop my head (to my instructors amusement) and playback shows the lack of stability.  Often we would get picked up and tipped sideways or lifted or dropped or all at the same time.  It was a fight.

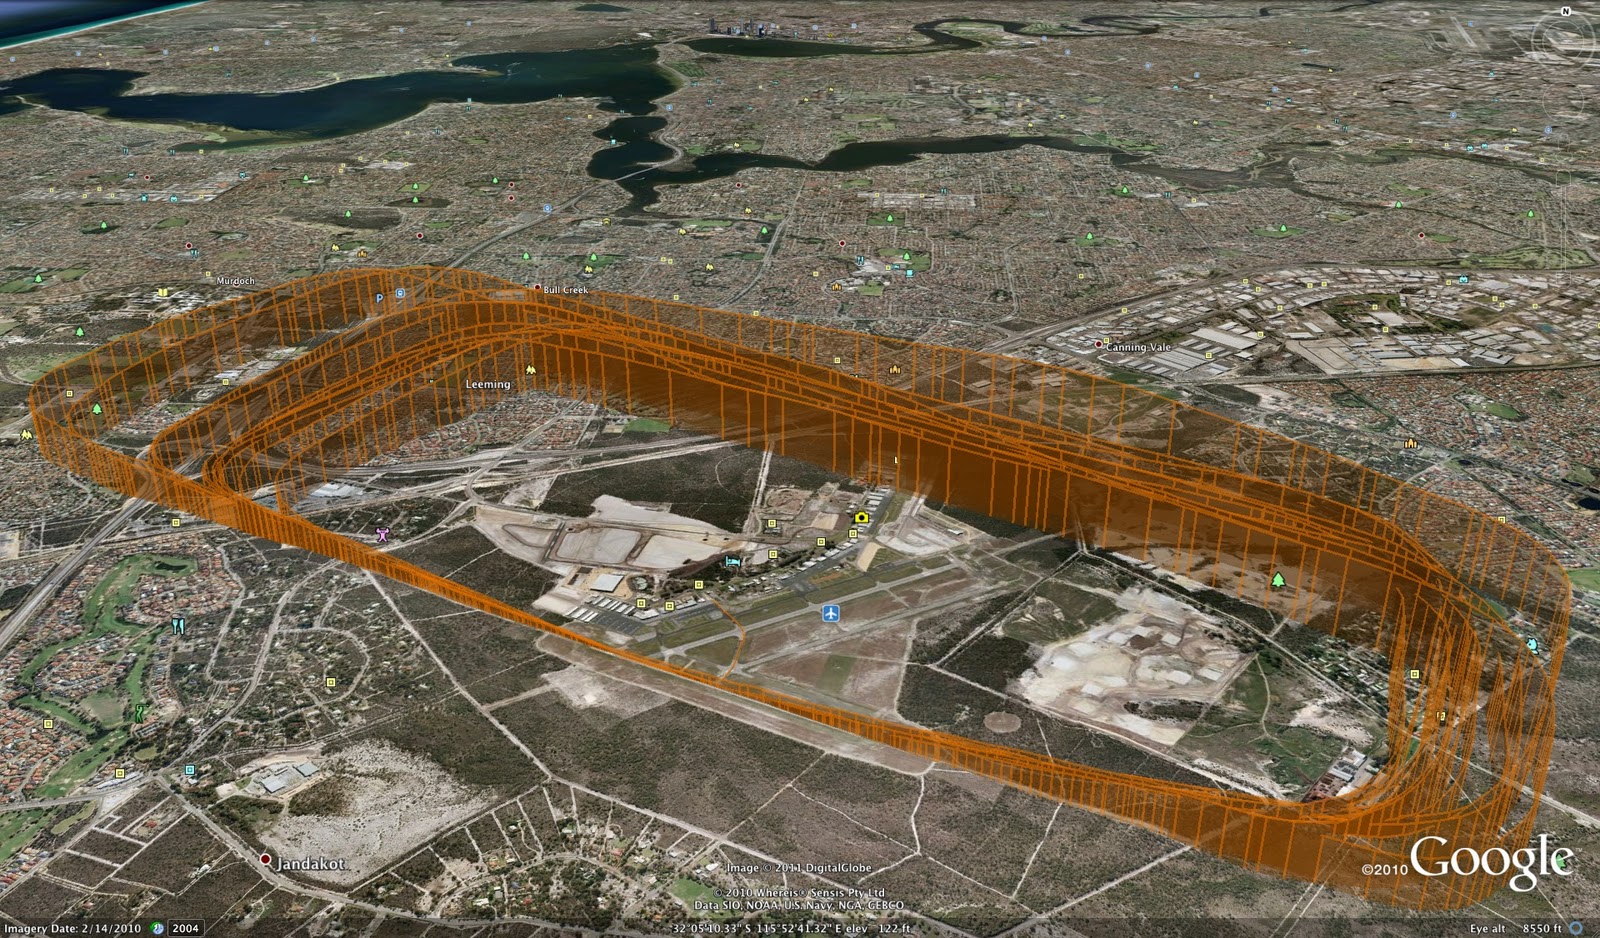
On the final of Circuit 1, I handed control to Adam (instructor) and he demonstrated the landing.  Somewhat good cross wind technique but with the gusts it was near impossible to maintain a steady approach and he was constantly compensating.  From the landing it was straight into the ground run for the lift off again.  After that, it was over to me.  I re-trimmed straight away and wrestled out another circuit.  On the base leg, we had a good 30-40 degree of drift compensation going on, totally nuts.

On finals of my first approach, we got blown well left of the runway and high, so we did a go around.  It was another round of fighting.  On this approach we managed to get the plane on the ground for a not too bad landing.  Straight around again.  Each minute, you could feel the conditions getting worse.  We did another circuit and landing and did a little bounce after touch down.  It wasn’t hard, just a huge gust of wind came and it lifted us straight up.  Using a little power to provide some lift, it was a smooth touchdown.

This time around, I was feeling a real pinch in my left back, the constant strain of the aileron fight was taking its toll.  Comfort levels were decreasing quickly.  On the downwind leg we advised the tower of a full-stop landing, sweet!  Anyway, the fun just started…

The circuit wasn’t too bad, we were advised we were clear to land following a Vans on late final.  We spotted the traffic and turned into the base leg of the circuit.  My back was pinging with each gust of wind, fighting to keep “stability”.  On turning final, I lowered the flaps at perfect height for our approach.  On lowing the nose I caught sight of another aircraft on finals, just ahead of us.  He had come from no where and the tower didn’t mention anything.  Listening back on my new recording gadget, he was advised to approach overhead and join on the downwind leg behind a Cessna turning base (us), but instead he flew straight in.  Needless to say, we went around…

After another circuit, there were no unsuspecting planes in front and we had clearance. The landing was ok, but really rocky on finals.  Back on the deck and after shutdown, I kept thinking about where that other aircraft had come from…

The conditions today were just rubbish.  But I got so much more out of today than I could have imagined (not including the shoulder pain):

1. Adverse conditions provide a huge distraction from the basics
You have to keep focused on the mandatory basic tasks.  Today I forgot my downwind checks twice.  Also, I found it difficult to keep the circuit height in check.  It was still within the limits, but hard to manage in the conditions.  Also, on the decent, keeping the speed under control was more difficult (ie. getting high on decent).  All these were probably a result of the conditions and the building pain in my shoulder.

2. Respect for the conditions
You can never have enough respect for the wind and weather.  It is a lesson I’m glad I learnt early.  If you have any doubts, keep your feet planted on the ground and go have a beer.

3. Lookout and Lookout again
With the Cessna coming straight in, rather than joining the circuit as advised, it shows that you can’t make assumptions about other aircraft.   Look all around, but also up and down as best you can…

4. Experience, Experience and more Experience
Getting experience in all the techniques, keeping your head and building your skills is so so key here.  Adverse conditions could come your way anytime.  Although I got the aircraft landed 3 times today, I didn’t feel totally comfortable or confident at any point.

Until next time, I’m on Voltarin and Panadol every 4 hours till this shoulder / back eases up…  Will post some video extracts of the flight soon, it looks nuts 🙂

Posted in cessna 152, Jandakot, Pilot License, Uncategorized | Tagged , , | Leave a comment

Lesson 11 – Plane Engine Failure!

Advanced Circuits

Lesson 11 was all about what to do in the event of an engine failure and issues which can occur.   This included:

  1. Plane engine failure during takeoff
  2. Engine failure after clearing the field (on climb)
  3. Engine failure where you can make the runway
  4. Landing without flaps if there is an electrical or mechanical issue
  5. Flying at low level if their is poor visibility

What this all translates into is some really practical skills and potentially life saving skills.  Similarly gaining confidence in the capabilities of the aircraft to deliver you safely to the ground.

1. Engine Failure during takeoff

This is the best of a bad situation.  In a small single engine plane, if there is still runway available, you basically setup the plane for a safe landing and get back on the deck.  We didn’t simulate or validate this situation, but because the Cessna 152 gets off the ground quickly, there is a stack of runway left.

2. Engine Failure after clearing the Field

This is a bad situation.  You may not have enough altitude or be able to glide back to the runway.  We simulated this by bringing the plane back to idle, setting up for re-starting of the engine (which may reveal why it failed in the first place) and getting in the glide attitude with the nose down.  You quickly grasp the reality of this situation.  In front lay a large field of houses and the odd small park.  We basically have a 30 degree field of view in front in which to choose.  On the first attempt we would have set down in the middle of a field of cricketers, but realised quickly we wouldn’t have made it.  On the second, we would have got it middle stump.  This situation drives home the importance of the run-up checks and the symptom checks during the takeoff run.  I don’t want to be in this situation and if you can pick it earlier, all the better.   The check is: 1. Is the RPM steady and full, 2. Are the oil pressure and engine temperature in the green, and 3. Is the air speed rising.  If you get any concerns of these three factors, stop quickly…

3.  Engine failure where you can make the runway

This simulated by doing a glide landing.  From the downwind leg, you shutoff the engine or bring it back to idle (The second choice is best).  So you now no longer have power.  You keep your attitude and get as much height as possible as the airspeed drops to the best life/drag ratio.  In the Cessna 152 it is 65 knots.  Once you hit 65 knots you lower your attitude to maintain 65 knots.  When Adam was simulating it, it was perfectly clear we were going to come in short of the runway, probably the grass area.  Anyway, he was saved by a go-around request from the tower.  A plane was too slow taking off, so we got bounced.  On my attempt I cut the downwind leg short and got in nice and early.  With my aim about 30% up the runway I had heaps of height left.  To the extent I was able to lower the flaps fully once I knew we would make it.  It was sweet to nail that.

4. Landing without flags

I feared these and it was totally unfounded.  Based on being a 6′ 1″ male, you line the end of the nose just above the piano keys at the end of the runway and you are sweet!  The higher nose attitude means you have less visibility but the aircraft is pretty much in the right attitude for the flare.  So for flare you simply kill the power, pull back slightly and let it wash off the airspeed.  Adam demo’d and I did two practices.  These were probably close to two of my best landings of the day, although when I look on the video, all bar the first two, the rest were pretty spot on.

5. Flying at low level

Flying the circuit at 500ft is a skill needed when there is poor visibility.  We didn’t get to do it, as the circuit pattern was full the whole time, the tower wouldn’t give us clearance.  In a few lessons time we’ll head to Murray Field near Mandurah, or over to Rotto to do a few there.

Anyway, the lesson was fun, I felt that I really got a good grip of landings compared with my previous lessons.  CASA paperwork and Chief Flying Instructor permitting, my first Solo is just around the corner.  I feel ready!  By the way, the carb heating problem was resolved today 🙂

Posted in Uncategorized | Leave a comment

>Best Pilot Headset = Lightspeed Zulu

>

Lightspeed Zulu Aviation Headset

That is like a Microsoft fan claiming that Windows is a superior operating system than Mac OSX, or the Holden HSV GTS is a direct comparison to a BMW M5 (Mr Clarkson), or that Airbus is better than Boeing, these are just not true…  But in the case of the Lightspeed Zulu’s I have settled on this position, they are the best…

The major competition, according to untold Google searches, is that the BOSE A20 is now the king of the hill.  I tell you what, I almost agreed and got drawn into the mega marketing that is BOSE.  However being one of those types that has to research and research until finally the point comes where you try yourself then research again, I made a different decision.  The Lightspeed Zulu across the broader criteria suited me the best.

To qualify my position, I’m a huge BOSE fan.  I have a BOSE Acoustimas 15 surround sound system in the living room, a pair of BOSE 251 SE outdoor speakers by the pool and my iMac lets itself be heard through a set of BOSE Companion 5 multimedia speakers.  So the BOSE headsets were almost a given.  A close friend who is a commercial pilot who transverses the pacific at least weekly (in Boeings) even said, you gotta get BOSE.

So my evaluation was literally based on the fact that the headset should not consume any conscious thought when in the air.  They should just be there, like your jocks, perform their function really well and you should not have to compensate or suffer any level of discomfort as a result of their close proximity with your body.  This translated to these high level criteria:

  • light and comfortable (I’m easily distracted)
  • strong noise cancelling capability (still easily distracted)
  • great mic capability (I don’t want to have to swallow the mic)
  • mobile phone integration (gadget freak)
  • great sound (your dealing with an audiophile here)

Having spent the first few hours of my somewhat short flying career wearing flight school David Clark’s, I knew exactly what I didn’t want.  They were inverse to the above criteria.

When you cut through what the large community of evaluations say (consider only those that are not flanked by BOSE advertisements), you get a picture than these Lightspeed Zulus have the overall edge of the Bose A20s.  There are tonnes of real pilots who have used and tested both.  Me, I can’t argue with those using them hour in and hour out, but I can form my view.

They are very close when it comes down to it.  The BOSE A20 look better, have a better brand cred, but suffer on price.  The price no doubt comes from brand cred, the huge marketing expenses and the market position of BOSE in aviation.  The price for me wasn’t a decider.  This is overcome by convincing oneself that, “you’ll have them for life”…

On the lightness and comfort, noise cancelling and mic, it was near impossible to differentiate.   The test I used was to validate these criteria was to put on the headset, make a phone call while the kids argued and look to “dad” for mediation, then assess the ability to conduct the call.   Well the noise cancelling ability removed their pleas for intervention and I could conduct the phone call in peace.  Actually the Lightspeeds Zulu had better sound cancelling than the Bose A20 with this test.

The deciders was the sound quality and the gadget integration.  Both the Bose A20 and Lightspeed Zulu did connect to my iPhone 4 easily.  They both were able to initiate voice control and I could issue voice commands.  The problem I found here though was that when I issued the voice commands with the Bose A20, I would get the wrong action.  When I did the same test with the Lightspeed Zulu, I didn’t have a problem.  For example, I would issue the voice command “Play Jay-Z and Alicia Keys”.  With the Lightspeed, “Empire State of Mind” started and played beautifully in my ears.  The same test on the Bose A20 had my phone say, “Calling Jean-Michel Charette”.  What the?  But I could repeat the test consistently and had both myself and the shop assistant confused…

Lightspeed Zulu gets the thumbs up

Then the sound quality, you have to hear the Lightspeeds in action, they are just amazing.  Music playback is just fantastic.  Over bluetooth its pretty good, but if you plugin the extenal input adaptor, wow!  With my new “Flight Sound X” usb adaptor, music playback from the computer was exceptional.  These things would rival my Sennheiser HD600 headphones for sound quality, just incredible.   So on that cross country flight, long hall trip or the drone of your Lycoming power plant, fire up some music in your Lightspeeds and you’ll be amazed.  When Perth Radar decides to interupt, the music drops away and you hear the full radio transmission.  Sweet!

So, a few points to finish up.  Since having the Lightspeeds, I can’t recall them even featuring entering my conscious thought while in the plane.  My flying instructor now has ordered a pair.  When he went to the aviation shop onsite at Jandakot, there were none left as the Royal Flying Doctor Service (RFDS) had bought them all up as the preferred headsets by their flight crews.

Do yourself a favour, look more broadly than strong marketing opinion and consider giving up where  history mis-guide your choices, buy the Mac…  I did and have never looked back!

Posted in lightspeed zulu versus bose a20 aviation headset best choice compared | 8 Comments

>Lesson 10: More Circuits

>The plan for yesterdays lesson was to get in as much circuit practice as possible, primarily to work on the landings.  With an hour and a half first thing in the morning, the conditions should be spot on.  Maybe less wind and of course the opportunity to maximise the number of circuits.

On arriving at Jandakot, it was runway 12, so that meant all the circuit and general traffic were going to have to share.  Normally with runways 06 or 24, there are parallel runways to separate the traffic, meaning less hold ups.  The wind heading was 160 at 15 knots and a cross of 12.  Not exactly what I had ordered.  My instructor asked several times if I was sure I wanted to go up, let alone an hour and a half.  Primarily because he knew I wanted to work on my landings without cross winds, like every other time.  When you wait a week and are excited to get up, a slight variance from perfect is still good.

We had VH-IGX today.  So we did the pre-flight, found she had 80 litres on board (full) and but we needed to add some oil.  With that all done, we headed straight off.  There was already 3 aircraft queuing and 3 more in the run-up bay.  In addition, 3 aircraft were already doing circuits.

By the time we taxied and did our run-up, there were 3 in front.  It wasn’t a long wait though, within 5 minutes were were all airborne.  It was straight into the circuits today.  This was the first time doing circuits on runway 12 and I wasn’t sure of the typical waypoints for turning each leg.  After the first though, which on the Google Earth trace, showed was the widest and less rectangular patter, it was straight forward.

We had 3 others in the circuit with a significant share of others departing and arriving into the circuit for their landings.  I actually valued the shared runway today, as it taught me 10 times more about situational awareness than any previous lesson.   We had all sorts.  Arrivals in front, behind, entering from the east, west, north and south.  We also had another aircraft who joined for circuits in front who with their twin decided to extend the downwind leg.  Its a bit annoying as it extends yours too.  Our strategy, slow down and wait for them to come back and still try and maintain our regular downwind leg.  However looking back on the GPS log, we had a few irregular patterns.  All of which were generally joining behind an inbound aircraft.  The other thing I noticed on the GPS track, was I managed to fly through the middle of my brothers house.

The other skill that isn’t really discussed though, is spotting other aircraft.  It is a bit of a challenge, particularly when they are lower and inbound.  With the background of buildings it is often really difficult. The tower tries to help you though, “the twin should be in your 1 o’clock, sorry, your 11 o’clock”.  I found an aircraft at 11 o’clock and at 1 o’clock.  We made a call to the tower to double check, it was the 1 o’clock.  It pays to double check when your not sure.

So the long and short of the lesson, how did the landings go?  They were ok.  Out of the 12, Adam assisted 3 times, being the first 3.  After that it was all me.  Of the 9 remaining then, 2 were perfect, 1 was good, 1 was a bit hard.  The rest, well they all had a balloon.   What I was doing when pulling into the flare, was rather than just straight and level, I was pulling back a little too much.  I didn’t make the same mistake as last lesson and lower the nose, I kept it high.  The first balloon we were a little high and the touchdown was a bit harder than one would like.  The rest were actually ok.  After the first, Adam suggested a little bit of power to help soften the balloon.  By the end, all the balloons actually resulted in a pretty good touchdown.   Anyway, the post-mortem, when you nail the landing, you get a big smile and you crave more…

Here is the Google Earth map of the lesson.

Posted in Uncategorized | Leave a comment

>Soft Leather Pilot Bag

>Every pilot needs a good bag to carry their gear. There are headsets, navigation aids, kneeboard, VFR maps, timers, books, more books, torch, personal GPS, pens, logbook, clipboard, spare undies and most important your aviator sunglasses.

There are probably many elements that will go into the selection of the appropriate bag. Some that I’ve heard and others that I’m still years away from understanding. For me being a student, it is about practicality and keeping everything together. There could be the cool factor as well, “Yep this giant black rigid bag on wheels means I’m very important, there are lots of very important things in there that pilots need” (like your credit card to pay for the lesson when your done)…

So my choice, a black soft leather bag from PilotMall.com.  Why, on advice, a soft bag can be jammed into smallist spaces, can weather a good few bumps, and has a safe spot for everything you need including your credit card.  The other reasons, I didn’t want one of the big black boxes (aka bags) and it actually looks good as well.

In general I’m really happy with the bag.  Despite the $80USD to ship it to Australia, it is going to last a good while.  There are a few drawbacks with this bag however.  Lets talk about those.

First, the inside of the bag has a soft thin lining.  The velcro in the main part of the bag is attached to that lining.  When you attempt to remove or place any pressure on the velcro, the lining rips.  Its pretty poor quality from that regard.  The disappointing thing is that takes away in many respects from all the good qualities of the bag, which in every other way is well put together.  The other minor niggles, the end pockets will not fit your headset and the your log book doesn’t fit in the pocket shown in the picture…

So, overall I’m happy.  With all my student training books packed in, my Lightspeed Zulu’s, log book (in the size pocket), Go-Pro, GPS and a other bits and pieces, it fits well.  Watch this space to see what PilotMall is going to do about the lining, which in my case was already torn when it arrived.

The alternative which I’ve heard is the bag to have, the BrightLine Pilot Flight Bag.  Too small for my current needs, but maybe post PPL, it could be an option…

Posted in Uncategorized | Leave a comment

>Lesson 9: Flying circuits

>Saturday just gone was my first lesson for 2011.  It was mid-arvo and looking back at the ATIS notes on my clipboard the winds were from the South West at 18 knots with cross wind of upto 10 knots.   It was still earlier in the day, so maybe morning lessons could be a better choice.

This lesson was the second for circuits.  It was literally a repeat of the first lessons, but focusing considerably more on all the checks, flying a clean pattern and the main bit, nailing the landing.  So this lesson involved 2 go-arounds and 5 landings.  Blow by blow, this is how it played out…

Pre-flight was a quiz, Adam drew the circuit path on the whiteboard and my job was to fill it out with everything we would need to do.  That went pretty well.  Just quietly I’ve had the acronyms pinned up at work and have been glancing at them for the last couple of weeks for this exact moment.  Still I managed to get two things wrong, but nothing flying 7 circuits wouldn’t fix.  This week, the pin up is going to say “Carb Heat, Carb Heat, Carb Heat”.  I forgot it on the whiteboard and 6 times in flight…

What you forget after a few weeks out of the cockpit is how fast it all happens, the 3d movement and the smile 🙂

All I’ll say about flying the circuit pattern itself was:

  • to the female pilot in her own 2 seat Van’s kit aircraft, you own Adam and I beers!  (due to her long up-wind and down-wind legs, we had to follow and/or slow down as a result)
  • the base leg was fun with a 20 degree yaw to compensate for the drift
  • remember to turn on that damn carb heat, its not hard…

The first landing I was a bit high, so I called a go-around.  We have to do one anyway as part of the circuit training.  Cool, easy, until the tower called us a short upwind leg and asked us to turn early.  That was new…  The second circuit, the tower called a go-around on us.  This was due to an aircraft needing to make an emergency landing on runway 12 (which cuts across the end of our runway.  Meant was had a birds eye view of the stricken aircraft coming in to land safely.  That was a relief and I’m sure for him too.  Perfect glide landing without engine, sweet…

The rest were all touch and go’s.  I progressive improved, with a few no-no’s learnt on the way.  Ok, I just hadn’t got the flare well understood, but have it figured now.  Back off power, pull straight and level at small building height, cut power to idle and hold the nose attitude up as the aircraft sinks using a reference point at the end of the runway.  So, I managed to pull the nose up too quickly and ballooned us, then proceeded to drop the nose and only just pull us back up just above level for a “firm” touchdown.  Oops.  So the second to last was ok, but needed a little assistance as a cross wind gave us a sweep during flare.  Then the last…

On the way in Adam said there was no help coming regardless (he has said that before, but is always there to help when needed :).  Cool, as he sat back I asked if he was nervous.  We were on finals, maybe 400 feet and agreed the area was clear and we were going in.  The radio call from the tower confirmed our approval.  The track was sweet, the centre line was through my bum, he answered, “no its looking perfect”.  2 seconds later a gust pushed us well wide of the runway, he quickly piped up, “but I am now”.  Anyway, his good instructing paid off, I brought us back with 250 feet in hand, that centre line centre again.  Anyway, over the threshold, eyes on the other end of the runway, power back, flare, progressive attitude and sqreech, touchdown!  Got a good one, short roll and onto the taxiway.    Yay, it felt good to finally nail a good landing.  Oh yeah, this was the one circuit that the carb heat was done right too…

Debrief was good and apart from the flare and carb heat discussions, Adam was happy.  He reckons another hour together, an hour with Peter and it is likely Peter will send me up for the first solo.  Can’t wait!  The catch, remember the blog post on forms, well CASA have still to process my ASIC and Student Pilot license application which will take 6 weeks.  It didn’t help that they were sitting in the bottom of my bag waiting.  Tip, get your forms processed early early early!  Anyway, just means we move onto advanced circuits (no flaps etc)…

Below is the 3D flight path of the lesson (Google Earth Gadget) or click here to download the file to view in Google Earth…

Posted in Uncategorized | Leave a comment

>How to create a 3D flight track and visualisation

>A mate at work said, your 2D flight tracks are cool, but what they don’t really give you that same sense of perspective that a 3D view would provide. Damn, now that I’ve come to grips with what 3D maps may provide, the old 2D views just don’t cut it anymore…  Great, thanks Conrad!

So there begun the research into creating a cool 3D flight track…

My GPS is a Garmin Edge 305 cycling computer. It basically “tracks” your ride, distance, cadence (pedals speed per minute), heart rate, climb etc. Of course it is logging your location as well. You can then review and compare it to any number of previous rides in the great software about. I’m using Ascent  for the mac primarly (it is not yet in the new Mac OSX Apps Store).  This is the software which  produced the 2D maps on the other blog entries.   It can create Google Earth flyovers, but not cool 3D flight track logs   So, what about creating the 3D maps then…

Using Google, any number of searches found me some interesting info. Google Earth can display great 3D views of flight tracks, some sites provide live flight tracking views direct to Google Earth.  Then I discovered GPS Visualizer.  Let me share what I’ve found to hopefully help others who have the same questions.  So before we being, check out the 3D sample based on the Stalls lesson.

GPS 3D Flight Track Log – Stalls lessons


GPS 3D Flight Track Log – Take off and Landing at Jandakot

The steps to creating such views are as follows:

1. Get the GPS data file off your GPS device
I have to use the Garmin Training Center application with my GPS.  Once the GPS is sync’d with the app, you highlight the given event and then choose “Export <date>” from the file menu.  When it prompts you for a filename, make sure you choose the GPX file type.  Many other GPS devices and their software will let you grab the GPS data.  By the way, make sure you use “track” mode on your GPS, so that it records the entire flight.  My Garmin Edge 305 does that by default, so it is easy.

2. Use GPS Visualizer to create the Google Earth file for you
Goto the Google Earth mapping page on GPS Visualizer website.  Once there fill out the form as per the guide image below.  You can adjust various settings to influence the look in Google Earth.

Using GPS Visualizer to create 3D Flight Track Logs

The GPSVisualizer site will create a KMZ file.  Click on the KMZ file and it will launch Google Earth with you 3d flight log.  If you don’t have Google Earth installed, goto the Google Earth page and click download.

Now once you are in Google Earth, you can easily adjust the various views and even do a fly-over of the route.  Have fun!

I’m enjoying the new 3D views of my flight logs.  It is adding a new dimension to analysing and learning post lesson.  Thanks Conrad, no really, thanks 🙂

ps. to get an image out of Google Earth, choose File -> Email -> Email Image.  When the email client loads, you can save the image out.

Posted in Uncategorized | Leave a comment

>LiveATC iPhone app review

>So far I’ve installed a quite a few aviation apps on my iPhone and iPad, testing and using them to see if they are useful or not (ie. I feel compelled to use them regularly, or whether they get deleted).  My use of the apps will probably change over the course of being a student pilot through to being fully qualified.  For example in the early stages of training, navigation apps are not exactly of use, but I’m sure will top the list by the time the PPL box is ticked in my log book.  I’ll take that into account as I form an opinion on the various apps.

LiveATC then, it is currently near the top of my most used apps at the moment.  In fact, it is getting used passively while driving, catching the bus and even sitting at my desk at work.  Why you may ask?  Lets try and answer that question a little later…

LiveATC app is an iPhone app which allows live Air Traffic Control communications to be listened to on an iPhone, iPod Touch or iPad.  The content is streamed from the LiveATC website over your 3G or wifi connection.   Basically you can listen in on all the communications between Air Traffic Controllers and Pilots.  Now the only constraint is that you are limited to the airfields which have a stream via the LiveATC website.  So I would recommend checking that your local airports or those you are interested in are supported.

So the app itself, it is very straight forward to use.  Once the app is started, you simply select the ATC airport you wish, its various frequencies and then listen away.  The one catch I found was that my local airport (YPJT-Jandakot) was missing from the listing in the app.  So on the “Home” screen, I pushed the “Refresh Airports” button and a minute later I was in business.

In some cases the streams support multiple frequencies, rather than them split into seperate streams.  This is very handy, particularly for my local airport as it meant I can listen to ground, the circuits and the main stream and also Perth Radar at the same time.   It seems that they do have a priority order if multiple frequencies are transmitting at once, but it is not noticeable and doesn’t seem to be an issue, well not that I’ve noticed anyway.

So why am I listening to the ATC on the bus, driving and at my desk, when I could be listening to the Bono crank out U2’s Greatest Hits?  It isn’t that I’m an enthusiast  who has a desire to listen in for every event, rather, I’m using it as a tool to help me, as a student pilot, become more comfortable and familiar with ATC communications.  Basically in my first 5 lessons I truly sucked at talking to the tower.  The cheat sheet in front of me didn’t help with read-backs and other vital comms needed.  Given that effective radio communications if vital to your own and others safety, being competent is critical.  So while doing the business of aviating and navigating, communicating must become second nature also.

After a few days of listening to LiveATC, my radio communications has improve significantly.  In fact, my instructor commented in the lesson notes that he couldn’t believe the difference.  I didn’t  admit to how I’d achieved the improvement, but this is it.

So will I keep using LiveATC as I improve my radio skills.  Not sure yet, I have listened to a few international radio channels as well, such as the JFK International Tower (KJFK)  and the Perth Airport (YPPH) tower as well to get a feel for the commercial communications.  Much the same with different call signs.  However the radio communications involving more difficult conditions, such as icing, controlled airspace and non VFR flights was rather interesting.  I feel that I’ll be tuning into these from time to time as I get further through my training…

See the list of my installed iPhone apps and iPad apps here.

Posted in Uncategorized | Leave a comment